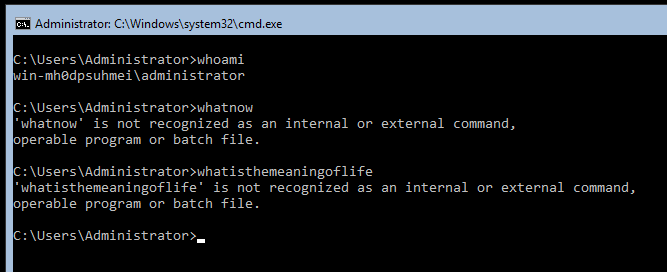
After installing Windows Server Core 2016 you might wander what to do with yourself next. If, like most people, you have always used Windows via the GUI then you are entering a whole new world. Being presented with only a CMD window on startup will be a little daunting at first. But you will learn how to drive it with a little practise. Here are some tips to get you started with configuring your first Server Core install and converting it to a Template so that you can create many more instances.
Launching Programs
As you have probably already noticed, Windows Server Core does still have a GUI of sorts. There is still a desktop that the CMD window sits on. You can also still open and run programs. For example:
– notepad will launch a notepad window.
– taskmgr will launch the Task Manager.
– powershell will launch a powershell session (in the current CMD window)
– start powershell will launch a seperate powershell window.
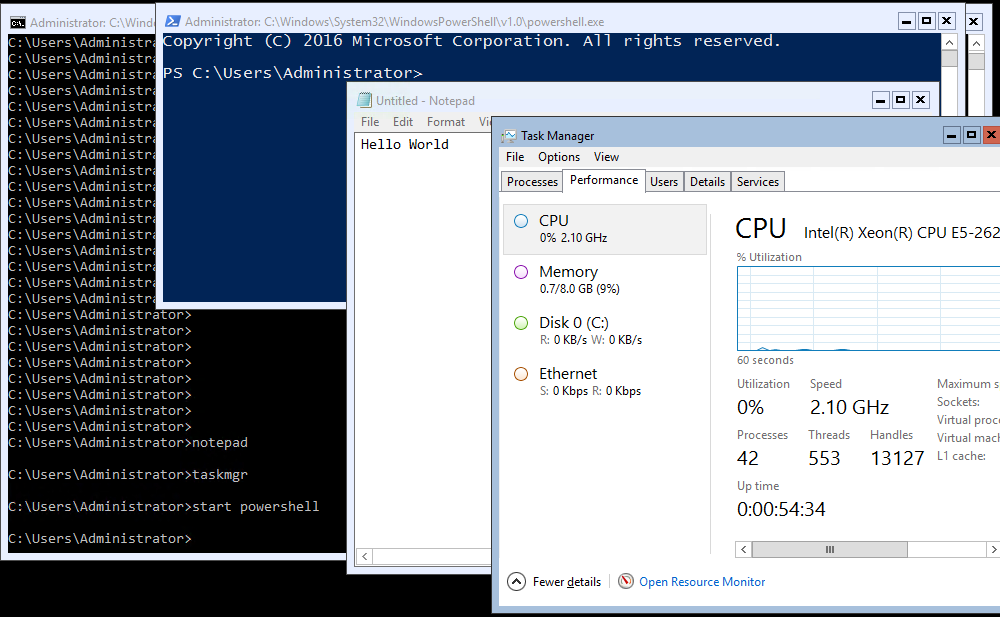
These programs can still be minimised and maximised, they just don’t sit on a ‘Task Bar’. Instead they just minimise down to small tiles that live along the bottom of the screen. For those of you that used Windows 3.1 you will remember how this works (showing my age here).
Installing XenTools
- Insert the XenTools ISO into the VM via XenCenter
start powershellto open a seperate powershell window because it’s much more… powerful.cd d:to change to our CD drive (replace d: with whatever letter your CD drive would be)start .\Setup.exeto launch the setup wizard. Even though we have no GUI, this will still run like it always has.- Run through the wizard selecting the usual options. I usually disable the automatic updates for better control.
Configuring the Basics
The ‘Server Configuration’ command line utility is a great way to configure the basic settings on your server to get it on the network and connected to your domain etc. This screen may just handle the bulk of the configuration that you require on your server. You can launch it from CMD or powershell by typing sconfig.
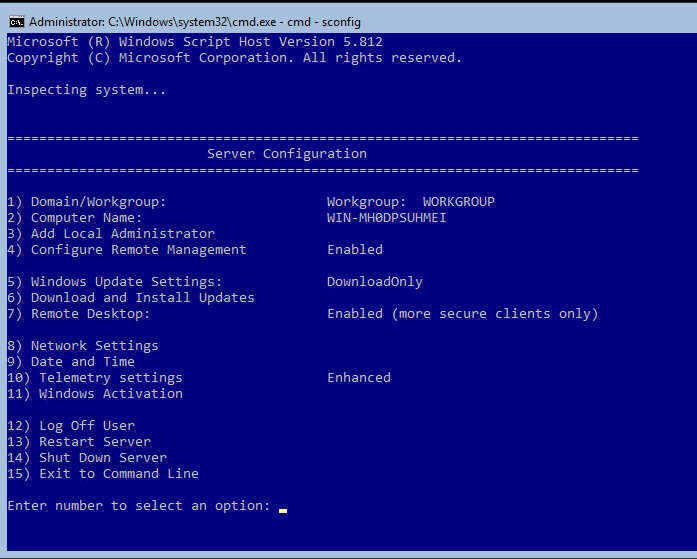
Network Settings
sconfig- Select option 8) Network Settings
- Follow the prompts to configure your network adapters
Remote Desktop
sconfig- Select option 7) Remote Desktop
- At this point you should be able to connect to the VM via XenCenter’s Remote Desktop console or any orther RDP client.
Windows Updates
sconfig- Select option 6) Download and Install Updates
- Follow the prompts to install your updates.
NB: If you are behind a firewall or on a private network with no Internet access, you may need to point your VM at a WSUS server.
Configuring Windows Updates to point to a WSUS Server
If you have a WSUS server on your LAN, you can configure the VM to use it by substituting the relevant address into the commands below. For example for servers on Softlayer/IBM’s private LAN you can use http://wsus01.service.softlayer.com. This may not be required if you push out the WSUS settings via a Group Policy on your domain. I always like to do updates before I join VM’s to the domain though, just out of habit (best practise?).
start powershellSet-ItemProperty -Path HKLM:\SOFTWARE\Policies\Microsoft\Windows\WindowsUpdate -Name WUServer -Value http://your.wsus.hostnameSet-ItemProperty -Path HKLM:\SOFTWARE\Policies\Microsoft\Windows\WindowsUpdate -Name WUStatusServer -Value http://your.wsus.hostnameSet-ItemProperty -Path HKLM:\SOFTWARE\Policies\Microsoft\Windows\WindowsUpdate\AU -Name UseWUServer -Value 1- To check that these registry settings have all saved properly you can use the powershell Get-Item commandlet:
Get-Item -Path HKLM:\SOFTWARE\Policies\Microsoft\Windows\WindowsUpdateGet-Item -Path HKLM:\SOFTWARE\Policies\Microsoft\Windows\WindowsUpdate\AU- If you re-run the Windows Updates in
sconfignow you should now pull updates from the WSUS server.
In the old ‘GUI’ days, this would have done this by opening MMC, adding the Group Policy Snap-in and then finding the policies that control the registry keys we are editing here. MMC does not come with Server Core but you can connect to it from a remote ‘full install’ windows machine that has MMC. There is some setup required to make this work however which I won’t cover here.
Converting the VM to a Template (SysPrep)
To convert this VM to a template we need to ‘reset’ Windows using the System Preparation Tool. This will mean that when we clone the VM Template we will be creating a fresh new VM rather than a copy of the existing one with the same hostname etc.

start powershellC:\Windows\System32\Sysprep\sysprep.exe- Under System Cleanup Action select
Enter System Out-of-Box Experience (OOBE) - Tick Generalize
- Under Shutdown Options select
Shutdown - Wait for the VM to completely shutdown
- In XenCenter, right click the VM
- Select Convert to Template…
- Click Convert
- The template is now ready to be used to create new VM from
Creating a new VM
- In XenCenter, click VM (Top Menu)
- Select New VM…
- Select the template you just created
- Continue through the wizard selecting the relevant options.
In the next post I’ll show you how to configure our new VM as an IIS server.